Mastering Dill Drying: Preserve Your Harvest for Year-Round Freshness
Imagine the vibrant, fresh taste of dill enhancing your meals, even in the dead of winter. It's not a culinary dream, but a simple reality once you master
how to dry dill. Whether you're a seasoned gardener with an abundant harvest or simply want to preserve that leftover bunch from the grocery store, learning to dry dill is an incredibly rewarding skill. This comprehensive guide will walk you through various easy and effective methods, ensuring you can enjoy this versatile herb in all your favorite dishes, all year long. Say goodbye to expensive, store-bought dried dill and hello to superior flavor and aroma from your own preserved supply!
Drying dill at home not only extends its shelf life but also locks in that distinctive, slightly anisy, fresh flavor that makes it a favorite in everything from pickles and salads to fish and potato dishes. Beyond the culinary benefits, preserving your own herbs is a fantastic way to save money, reduce food waste, and even enjoy organic dill if you grow it yourself. For a broad overview of different drying techniques to keep your kitchen stocked, you might find more inspiration in our article on
Easy Ways to Dry Dill and Enjoy Fresh Flavor All Year.
Essential First Steps: Preparing Your Fresh Dill
Before you embark on any drying method, proper preparation is key to ensuring your dried dill maintains its quality, flavor, and safety. These initial steps are universally applicable regardless of whether you choose a dehydrator, air drying, or your oven.
1.
Thorough Washing: Begin by carefully washing all your fresh dill sprigs under cool, running water. This removes any dirt, dust, or tiny insects that might be clinging to the leaves. Handle the delicate fronds gently to avoid bruising.
2.
Eliminate Excess Moisture: This is a crucial step! Any residual water on the dill can hinder the drying process and even lead to mold growth.
*
Salad Spinner Method: The quickest and most efficient way is to place the washed dill in a salad spinner and give it several good turns, just as you would with lettuce.
*
Paper Towel Method: Alternatively, lay the dill sprigs in a single layer on clean paper towels, then gently pat them dry with another layer of paper towels. You can also roll them lightly in a clean kitchen towel.
3.
Separate Leaves from Stems (Optional but Recommended): For optimal results, especially with younger dill, it's often best to separate the feathery leaves from the thicker stems. While the stems do contain some flavor, the leaves dry more uniformly and result in a finer, more potent dried herb. You can do this by gently pulling the leaves off the main stem. If you have dill with flower heads or seeds, separate those out as well, as they require different drying times and methods.
Once your dill is clean and thoroughly dry, it's ready for the drying method of your choice.
Method 1: The Dehydrator Method for Optimal Control
Using a food dehydrator is arguably the most efficient and reliable way to dry dill. It provides a controlled environment, ensuring even drying and excellent preservation of flavor and color. This method is perfect for anyone with a dehydrator or those looking for a consistent, hands-off approach.
1.
Prepare Your Dehydrator Trays: Line the dehydrator trays with a piece of parchment paper. This prevents the delicate dill leaves from falling through the grates as they shrink during drying.
2.
Arrange the Dill: Evenly scatter the prepared dill leaves (or small sprigs) in a single layer on the parchment-lined trays. Ensure there's enough space between the pieces for proper air circulation. Overcrowding will prolong drying time and may lead to uneven results.
3.
Set the Temperature: Adjust your dehydrator's temperature to approximately 95 degrees Fahrenheit (35 degrees Celsius). Low and slow is the key for herbs to retain their essential oils and vibrant color.
4.
Initiate Drying: Allow the dill to dry for a duration of four to six hours. However, drying times can vary based on humidity, the thickness of your dill, and your specific dehydrator model.
5.
Monitor and Check: Begin checking the dill's texture after about four hours. Properly dried dill should be brittle and easily crumble between your fingers. If it still feels pliable or soft, continue drying and check every hour until it reaches the desired crispiness.
The dehydrator method is fantastic for preserving large quantities and ensures a high-quality product every time. For a deeper dive into preserving your garden's bounty, explore our guide on
Preserve Your Dill Harvest: Dehydrator, Oven, and Air Methods.
Method 2: Air Drying Dill – The Timeless & Tool-Free Approach
For those who prefer a traditional, energy-free method, air drying is an excellent choice. It requires no special equipment, just a little patience and the right environment. This method is particularly suitable for smaller quantities of dill.
1.
Bundle Your Dill: After washing and patting dry, gather several dill sprigs into small bundles. Don't make the bundles too thick, as this can hinder airflow and lead to mold. Secure each bundle tightly with twine, a rubber band, or even a twist tie.
2.
Find the Right Spot: Hang the dill bundles upside down in a safe, dry, warm, and well-ventilated area of your home. Ideal locations include a pantry, a quiet corner of your kitchen, or a spare room. Avoid direct sunlight, which can bleach the color and diminish the flavor of your herbs. A dark, dust-free environment is best.
3.
Allow to Dry Naturally: Let the dill bundles hang undisturbed for a period of approximately one to two weeks. The exact time will depend on the humidity levels in your home and the thickness of your bundles.
4.
Assess Dryness: After one week, start checking the dill. It should feel completely dry, crisp, and easily crumble in your hands when gently touched. If it's still flexible, allow it more time to hang.
5.
Protect from Dust: To keep your herbs clean while air drying, you can loosely cover the bundles with a paper bag (with holes cut for air circulation) or a breathable mesh bag.
Air drying offers a wonderfully rustic charm and connects you to age-old preservation techniques.
Method 3: Oven Drying Dill – The Quick Solution
When time is of the essence and you don't have a dehydrator, your oven can serve as a surprisingly effective tool for drying dill. This method is faster than air drying but requires careful monitoring to prevent burning.
1.
Preheat Your Oven to the Lowest Setting: The key to successful oven drying is very low heat. Preheat your oven to its absolute lowest temperature setting, ideally between 170-200 degrees Fahrenheit (75-95 degrees Celsius). If your oven's lowest setting is higher, you'll need to be extra vigilant.
2.
Prepare Baking Sheets: Line a baking sheet with wax paper or parchment paper. This prevents the dill from sticking and makes for easier cleanup.
3.
Spread the Dill: Arrange the prepped fresh dill (preferably just the leaves) in a single, even layer on the prepared baking sheet. Again, avoid overcrowding to ensure uniform drying.
4.
Drying Time & Monitoring: Place the baking sheet in the preheated oven. Allow the dill to dry for approximately 25 minutes, but **crucially, check its progress every 5 to 10 minutes** to avoid over-drying or burning. Herbs dry very quickly in an oven. You might even want to leave the oven door slightly ajar to allow moisture to escape and prevent the temperature from rising too high.
5.
Cool Completely: Once the dill is completely dry and easily crumbles, remove the baking sheet from the oven. Let the dried dill cool completely on the baking sheet at room temperature before proceeding to storage. Cooling is vital as it helps prevent condensation in your storage containers.
The oven method is a fantastic way to quickly preserve dill when you're in a pinch, but vigilance is your best friend here.
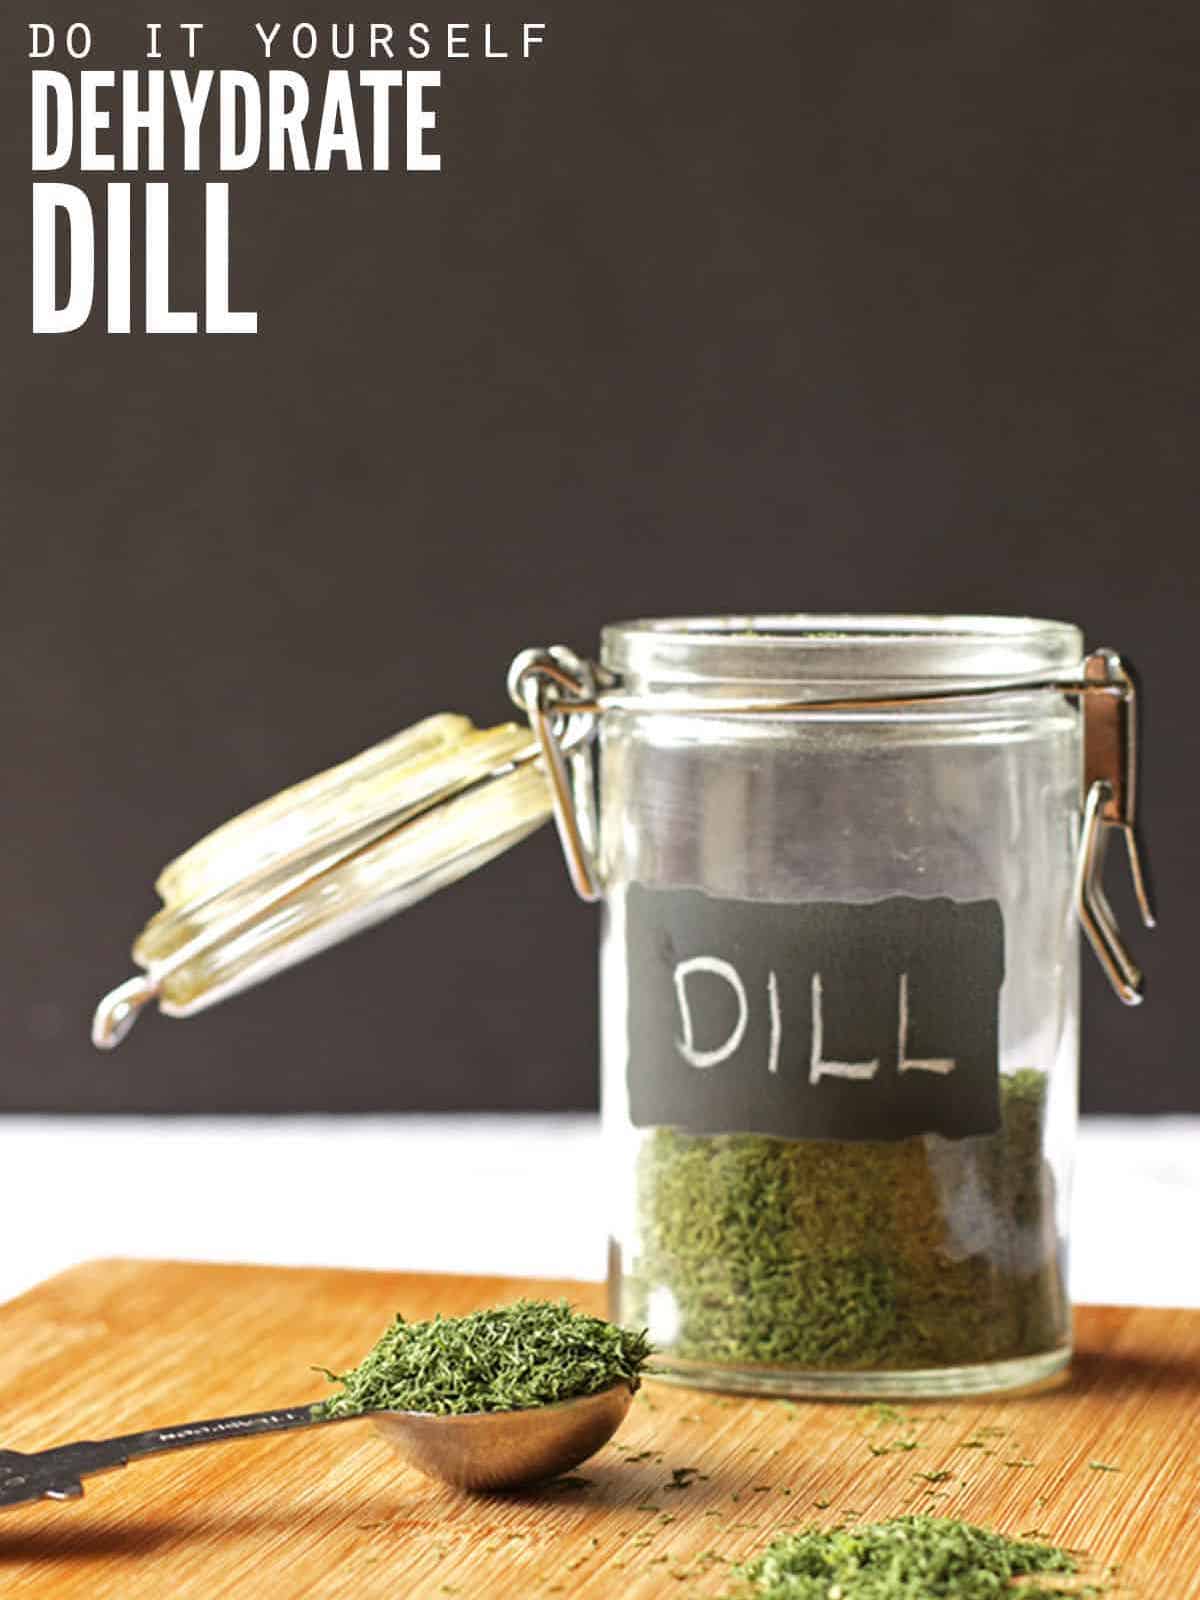
Post-Drying Processing and Storage for Lasting Freshness
Once your dill is thoroughly dry using any of the methods above, the final steps are critical for maximizing its flavor, potency, and shelf life.
1.
Grinding the Dried Dill:
* **For Whole Dried Dill:** If you prefer to store whole dried dill leaves and crumble them as needed, you can skip grinding for now.
* **For Ground Dill:** For a ready-to-use herb, transfer the completely dried dill sprigs or leaves into a spacious bowl. Gently crush them with your hands, or use a mortar and pestle for a more consistent texture. For a very fine powder, a clean spice grinder or coffee grinder works wonderfully. The aroma released during this step is incredibly satisfying!
2.
Proper Storage:
*
Airtight Containers: The enemy of dried herbs is moisture and air. Transfer your ground or whole dried dill into airtight glass jars or containers. Small canning jars with tight-fitting lids are ideal.
*
Cool, Dark Place: Store your sealed containers in a cool, dark pantry or cupboard, away from direct sunlight, heat sources (like stoves or windows), and humidity. Light and heat degrade the herb's flavor and color over time.
*
Labeling: Don't forget to label your containers with the herb's name and the date it was dried. This helps you keep track of freshness.
3.
Shelf Life: Properly dried and stored dill can retain its potency and flavor for 6 months to a year, sometimes even longer. You'll know it's time to refresh your supply if the aroma significantly fades.
The Abundant Benefits of Drying Your Own Dill
Now that you've mastered
how to dry dill, you're not just preserving an herb; you're preserving flavor, saving money, and adding a touch of self-sufficiency to your kitchen. The satisfaction of reaching for your homemade dried dill – knowing exactly where it came from and how it was processed – is unparalleled. You'll find it superior in taste and aroma to many store-bought varieties, and it's a testament to the simple joy of working with nature's bounty. Embrace year-round freshness and transform your cooking with this simple, yet powerful, preservation skill!