Imagine the delightful, distinctive aroma of fresh dill gracing your favorite dishes, even when winter winds howl outside. The good news is, you don't need a summer garden to enjoy this culinary pleasure year-round. Learning how to dry dill is a simple yet incredibly rewarding skill that empowers you to preserve its vibrant flavor and aroma, ensuring a steady supply for all your gastronomic adventures. Whether you're a seasoned gardener with an abundant harvest or simply want to make the most of a grocery store bunch, preserving fresh dill extends its shelf life and allows you to savor its unique essence whenever inspiration strikes. Forget store-bought dried herbs that often lack potency; homegrown or carefully preserved dill offers a superior taste experience.
This comprehensive guide will walk you through three effective methods for drying dill – using a dehydrator, your oven, and the traditional air-drying technique. Each approach offers unique benefits, allowing you to choose the best fit for your resources and time. By the end, you'll be equipped with all the knowledge needed to confidently preserve your dill harvest, ensuring that delightful freshness is always within reach.
Mastering the Art of Dill Preservation: Essential Preparation Steps
Before embarking on any drying method, proper preparation is paramount. These initial steps are crucial for ensuring your dried dill is clean, free of excess moisture, and retains its peak flavor.
The Foundation: Cleaning Your Fresh Dill
Start by gathering all the fresh dill sprigs you intend to preserve. Gently wash them under cool running water to remove any dirt, dust, or potential garden critters. While dill is a delicate herb, a thorough rinse is necessary for hygiene.
Once washed, the most critical step for successful drying is the elimination of excess moisture. Water remaining on the dill can lead to spoilage or mold during the drying process, regardless of the method chosen. You have a few effective options: pat the sprigs dry with clean paper towels, or for larger quantities, a salad spinner works wonders. Simply load the dill into the spinner as you would lettuce and give it several vigorous turns until most of the surface water is removed. The drier your dill is at the start, the faster and more efficiently it will dry.
Separating Leaves from Stems and Seeds
While the stems of dill can carry some flavor, for most culinary applications of dried dill, you'll want to focus on the delicate, feathery leaves. Carefully pluck the leaves from the thicker stems. If your dill has gone to seed, you can separate these as well. Dill seeds have their own distinct flavor and can be dried and used as a spice, but for dried dill herb, the leaves are the prize. Concentrating on the leaves ensures a more potent and pleasant final product.
Method 1: The Dehydrator – Precision and Efficiency for Dried Dill
For those seeking a controlled environment and consistent results, a food dehydrator is an excellent investment for preserving herbs like dill. It offers a gentle, even heat that meticulously removes moisture while safeguarding the dill's delicate flavor and vibrant green color.
Step-by-Step Dehydrator Drying Process:
- Prepare Trays: Line your dehydrator trays with parchment paper. This prevents the small dill leaves from falling through the grates and makes cleanup easier.
- Arrange Dill: Evenly scatter the prepared dill leaves in a single layer on the parchment-lined trays. Avoid overcrowding, as good air circulation is key to efficient drying. Leave a little space between the sprigs to allow heat to circulate freely.
- Set Temperature: Adjust your dehydrator's temperature to a low setting, typically around 95 degrees Fahrenheit (35 degrees Celsius). Low heat is crucial here; higher temperatures can "cook" the dill, diminishing its flavor and color.
- Initiate Drying: Start the dehydrator. The drying process typically spans four to six hours, but this can vary based on your dehydrator model, the humidity in your environment, and the initial moisture content of your dill.
- Monitor and Inspect: Periodically check the dill throughout the drying cycle. After the initial few hours, inspect its texture. It should feel completely dry, crispy to the touch, and easily crumble between your fingers. If it still feels pliable or damp, continue drying for another hour or two, checking frequently until fully brittle.
Expert Tip: For optimal results, consider rotating your dehydrator trays every couple of hours to ensure even drying across all levels. A dehydrator provides a reliable way to achieve perfectly dried dill every time, making it one of the most effective ways to preserve your harvest. For more detailed insights into various techniques, check out our guide on Easy Ways to Dry Dill and Enjoy Fresh Flavor All Year.
Method 2: Air Drying – The Timeless, Tool-Free Approach to Preserving Dill
If you prefer a natural, low-tech solution, air drying is an ancient and effective method for preserving dill. It requires no special equipment, just a bit of patience and the right environment.
How to Air Dry Dill:
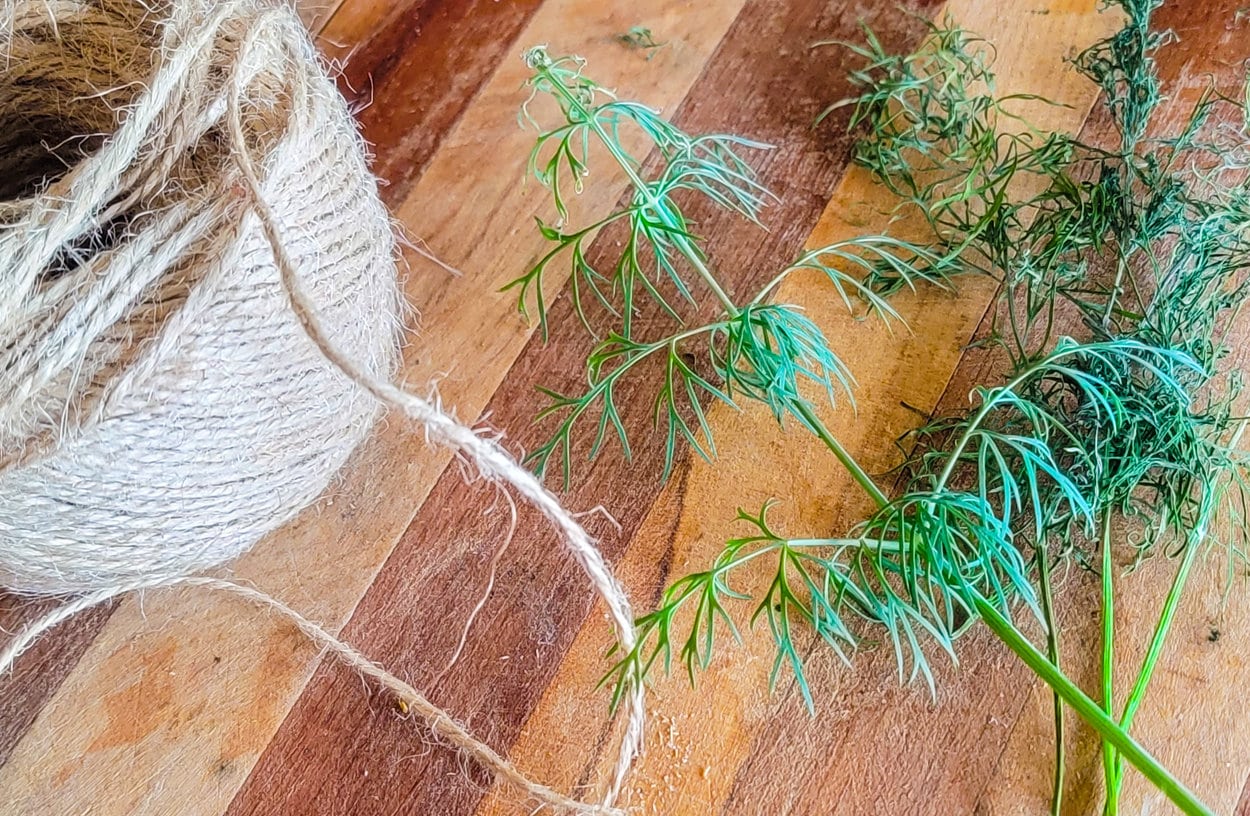
- Bundle Sprigs: Gather small bunches of dill sprigs (about 4-6 sprigs per bundle) and tie them together securely with kitchen twine or a rubber band. Don't make the bundles too large, as this can trap moisture and lead to mold.
- Choose a Location: Find a safe, dry, and well-ventilated area in your home to hang the bundles. Crucially, this spot should be out of direct sunlight, which can bleach the dill and diminish its flavor. A pantry, a closet, or a corner of your kitchen away from windows are ideal. Good air circulation is key to preventing mold and ensuring even drying.
- Hang Undisturbed: Suspend the dill bundles upside down. This allows gravity to draw moisture away from the leaves. Leave them undisturbed for approximately one to two weeks.
- Assess Dryness: After the initial week, gently feel the dill. It should be thoroughly crisp and brittle, crumbling easily when handled. If it still has any flexibility or feels soft, continue air drying for a few more days until it reaches the desired texture.
Considerations: While air drying is remarkably simple, it can be slower and more susceptible to environmental factors like humidity. Ensure your chosen location is genuinely dry to prevent mold growth. This easy way to dry dill might take longer, but the satisfaction of preserving your herbs without electricity is immense.
Method 3: Oven Drying – The Speedy Solution for Preserving Dill
When time is of the essence and a dehydrator isn't available, your oven can come to the rescue. This method is significantly faster than air drying but requires careful monitoring to prevent burning the delicate dill leaves.
Drying Dill in Your Oven:
- Preheat Oven to Lowest Setting: Preheat your oven to its absolute lowest temperature setting. This is often around 170-200 degrees Fahrenheit (75-95 degrees Celsius). Some ovens even have a "warm" setting or a pilot light that can provide enough gentle heat. The goal is to dehydrate, not cook, the dill.
- Prepare Baking Sheet: Line a baking sheet with parchment paper or wax paper. This prevents sticking and makes transfer easier.
- Spread Dill Evenly: Arrange the prepared fresh dill leaves in a single, even layer on the lined baking sheet. Avoid any overlapping to ensure consistent drying.
- Bake and Monitor: Place the baking sheet in the preheated oven. Allow the dill to dry for approximately 20-30 minutes, but it is absolutely critical to check its progress every 5 to 10 minutes. Dill leaves are very delicate and can go from perfectly dry to burnt in a flash.
- Cool Completely: Once the dill is dry and brittle, easily crumbling when touched, remove the baking sheet from the oven. Allow the dried dill to cool completely on the baking sheet before proceeding to the next step. Cooling ensures any residual moisture evaporates and the dill becomes fully crisp.
Warning: The oven method demands your full attention. If you're multitasking, it's easy to forget about the dill and end up with charred, flavorless leaves. When successful, however, it's a quick and efficient way to preserve a smaller batch of dill. By mastering these techniques, you'll not only save money but also elevate your culinary creations. For an even deeper dive into perfecting your herb preservation skills, explore our Master Dill Drying: Step-by-Step Guide for Year-Round Freshness.
Post-Drying Processing & Optimal Storage for Your Dried Dill
Once your dill is thoroughly dried by any of the above methods, a few final steps will ensure it's ready for long-term enjoyment.
Grinding Your Dried Dill:
You have a choice: store the dill as whole leaves or grind it. Grinding the dried dill leaves increases their surface area, which can release more flavor when cooked, and also makes them more compact for storage. You can easily crumble the brittle leaves between your fingers, use a mortar and pestle for a rustic grind, or employ a spice grinder for a finer powder. Some prefer to store dill leaves whole and grind them just before use, as this can help retain their essential oils and potency for longer. Experiment to see what you prefer!
Storing for Long-Lasting Freshness:
Proper storage is crucial for maintaining the quality and flavor of your dried dill. Transfer the ground or whole dried dill to an airtight glass container. Glass jars with tight-fitting lids are ideal as they don't absorb odors and provide an excellent seal. Store these containers in a cool, dark place, such as a pantry or cupboard, away from direct sunlight, heat, and humidity. Exposure to light and heat will degrade the dill's color and flavor over time. When stored correctly, dried dill can retain its flavor and aroma for six months to a year, though its potency will gradually diminish beyond that. Always label your containers with the date of drying to keep track of freshness.
Unlocking the Full Potential of Your Dried Dill: Tips and Uses
With your perfectly dried dill ready, it’s time to incorporate it into your cooking. Here are some tips to maximize its flavor and versatility:
- Harvesting Wisdom: For the best flavor, harvest dill for drying in the morning after the dew has evaporated but before the sun gets too hot. Choose vibrant, healthy sprigs, ideally before the plant flowers, as flowering can diminish leaf flavor.
- Potency Matters: Dried dill is generally more concentrated in flavor than fresh dill. As a rule of thumb, use about one-third the amount of dried dill compared to fresh dill in recipes. For example, if a recipe calls for one tablespoon of fresh dill, use one teaspoon of dried dill.
- Flavor Release: To help dried dill release its full flavor, add it to dishes early in the cooking process, allowing it time to rehydrate and infuse. This works wonderfully in soups, stews, sauces, and casseroles.
- Culinary Applications: Dried dill is incredibly versatile. It's a classic pairing with fish (especially salmon), potatoes, eggs, and cream cheese. Use it to enhance homemade salad dressings, marinades, dips, and yogurts. It's also fantastic in pickling brines, bread recipes, and even as a sprinkle over roasted vegetables.
- Rehydrating (Optional): While often not necessary for dried dill in cooked dishes, you can rehydrate it by soaking it in a small amount of warm water for 5-10 minutes before adding it to cold dishes like dips or salads, where you might want a slightly softer texture.
Mastering how to dry dill opens up a world of culinary possibilities, transforming a seasonal delight into a year-round pantry staple. Whether you opt for the precision of a dehydrator, the simplicity of air drying, or the speed of your oven, each method offers a pathway to preserving this exquisite herb. By following these steps and incorporating our expert tips, you'll not only save money but also infuse your meals with the authentic, vibrant flavor of dill, straight from your garden or kitchen. So, gather your sprigs, choose your method, and prepare to elevate your cooking with your very own homemade dried dill!
